So this is something that my mom always made when I was a kid, it was usually a summer dish. Come to think of it my dad would throw it together a lot too. Anyhow it was something we would have in the summertime and whoever made it would usually make a good sized batch and we would eat it for a few days till it was gone. It's pretty tasty and not a super heavy pasta salad, especially once it has sat for a day or 2 in the fridge and everything has set together. It's a pretty simple dish to make and especially great as a make-ahead meal.
I never got around to taking a pic of this dish, maybe next time I make it I will edit this post. Ha. Let's face it working full time and having 3 kids and trying to keep this up is a bit much. I think I will be sticking with my 2 recipes per week with a possible hiatus for the month of July; it will be a busy time at work for me and I will most likely be working 7 days a week.
Anyhow so on to the recipe.
Ingredients
1 lb elbow macaroni
1-1 1/2 cups mayo
1 can peas (DO NOT use frozen. unless you really like frozen peas. I loooove canned peas and hate frozen. mostly a texture thing but I think the taste is different too)
1 can tuna
Onion powder
Dill Weed
Celery Seed
Black pepper
Cook pasta according to package directions. Drain, rinse with cold water until noodles are cooled off a bit. Return to the pot. Add the peas and tuna and toss everything together (you can use a spoon but I always dig in with my hands). next add the mayo. I never measure the mayo it's more of tossing some on and mixing it in and seeing if it's too dry still. It's always better to add a little at a time if you are not sure than to add too much, you can't really take it back once it's in. If you like your pasta salad really mayo-y then by all means add a whole bunch. What I tossed on looked like about a cup or so to me. Next Add your seasoning, I have no clue what the measurements are, maybe a tbsp of onion, a tsp of all the rest? idk I just add some and mix it in, taste it and see if it tastes okay, and add more if I need to. Aren't I a wonderful teacher. Ha ha.
Anyways the little girl from next door was over when I made this and she ate 2 helpings and LOVED it. My kids barely touched theirs. Go figure. Maybe if I could find pasta shaped like lightning mcqueen and buzz lightyear I could trick them into eating it.
Tuesday, May 31, 2011
Monday, May 30, 2011
New Recipe 9/52: Radiatore Pasta with Alfredo Sauce and Diced Tomatoes
So this recipe I totally made up on the fly. My cupboards were looking kinda bare and I decided to take a chance and throw a few things together and it actually turned out pretty good!!!
I know I took a picture of this dish but now I cannot find where it was uploaded to. GRRRRRRR. So you will have to make it yourself to see how delicious it looks.
Ingredients
1 lb Radiatore pasta
1 jar alfredo sauce
Heavy cream-1/2-1cup
Mozzerella cheese-maybe a cup or so
Parmesan Cheese-1/8 of a cup or so
1 can diced tomatoes
Boil the pasta according to the package directions. In a saucepan, heat up the alfredo sauce. Add the heavy cream and the mozzerella and the parmesan. Once everything is blended and the cheese is melted, add in the tomatoes (drain them first). When pasta is cooked and drained, mix with the sauce mix. Top with parmesan. I served it with garlic bread.
This was such an easy way to make a jar of alfredo stretch to cover more pasta. The radiatore pasta I had had sitting in my cupboard for a while, I had picked it up on a whim cause it was a different shape. All the nooks and crannies of the pasta sucked up the sauce and it clung really well to the noodles. The whole dish came out well and even my picky kids ate some. Leftovers were not as good as the first time around but still pretty tasty. This is definitely something I will try again, maybe with some chicken next time and make it a slightly more complete meal.
Tuesday, May 24, 2011
Classic Recipe 8/52: Homemade Chicken Strips
This is something I have been playing around with for a while, I have made it several different ways, I will post the way I made them last night. It's nice to have fresh made chicken strips instead of the nuggets or popcorn chicken from the freezer section. It takes about the same amount of time you just have to watch them a little more than you would if you were throwing something in the oven.

Ingredients: 4 boneless skinless chicken breasts (I get the bag of frozen ones from walmart and thaw what I need as I need it, they are pretty cheap and taste okay)
Panko crumbs (I find these in the same aisle as regular bread crumbs, but they might be in the asian food section as well. They are lighter and crispier than regular breadcrumbs. Normally I used crushed corn flakes but I was all out so I used up some panko I had hanging around)
Flour (for dipping)
Heavy cream-a pint or so, maybe less. You could easily sub milk for this, I just had some cream I needed to use up
16 oz sour cream mixed with a ranch packet-this was something else I had laying around. I had not quite a whole package left. I mixed the sour cream and the cream together, but you could just as easily use an egg/milk mix to dip in as well.
Vegetable oil, for frying
Slice the chicken in half crossways (like you are butterflying them only cut them all the way) then slice them into strips. You can make whatever size you want, I try and make them all around the same size so they cook a little more evenly. Mix the sour cream with some heavy cream to thin it out. Dip the chicken in the flour, then cream mix, then panko. Heat the oil on the stove over a medium or so heat. Put in a few strips at a time and fry till they are golden brown on all sides. Add more veg oil as needed.

Monday, May 23, 2011
New Recipe 8/52: Shepherd's Pie
Wow I am super slacking this week. Sorry to anyone who might look forward to this being posted on time. :) Work has been kicking my ass lately, and our fridge is dying a slow death so we have limited fridge/freezer space compared to what we normally have.
Anyhow, I tried this recipe out after seeing Anne Burrell make it on Food Network. here is a link to the recipe: http://www.foodnetwork.com/recipes/anne-burrell/shepherds-pie-recipe/index.html
Here is what I did different from the recipe: I used a lamb breast cut up small because it was a cheaper cut of meat. This was a bad idea, the breast meat was really fatty and so there was a lot of bits of fat I had to keep spitting out when I ate it. next time I will suck it ujp and buy the right cut of meat. I didn't have any leeks so I used an onion instead. And I used dried thyme instead of a bundle of fresh thyme. I also did not use nearly the amount of salt on everything, but I rarely salt anything.
This recipe came out sooo delicious. It was really hearty and the brown gravy was soooooo tasty. This is partly what inspired my bison meatloaf recipe. There was a good amount of leftovers and there was no issues with getting them eaten up. It was a bit time consuming to make, not something I would recommend for weeknight cooking but for a sunday afternoon it would be perfect, then you could do leftovers monday night and not have to cook! It was a bit pricy to make, lamb is not cheap. I imagine you could sub the lamb for a cut of beef but I think you would be hard pressed to find something that is that tender.
I could have sworn I had pics of this dish but alas, there are none. I suck at life. I promise there WILL be pictures of the next dish! I might not have time to post till wednesday though, so have patience with me. :)
Tuesday, May 17, 2011
Classic Recipe 7/52: Spaghetti and Meatballs
How much more basic can you get than spaghetti and meatballs? I love food with red sauce on it and I love meatballs and I love pasta. You just can't go wrong. This is my basic meatball/sauce recipe which is a combination of how my mom taught me to make it and other recipes I have seen and/or tried along the way.
For the meatballs: 1 lb ground beef, one lb pork sausage (I use the farmland's best breakfast sausage-cheap and tasty and comes in 1-lb rolls so I always have a handful of them in my freezer). Bread crumbs, parmesan cheese (the finely grated kind), oregano, parsley, italian seasoning, pepper. 2 eggs.
For the sauce: 1 jar spaghetti sauce, 1 can diced tomatoes, 1 onion, 1 pepper, 1 can mushrooms (or some fresh), parmesan + all the seasonings you used in the meatballs.
Start the meatballs first. Preheat the oven to about 350. Put your meat into a mixing bowl and add in your eggs, bread crumbs (maybe 1/2 a cup or so) and parmesan (about 1/4 cup). For the seasonings you are maybe using 1 tsp or 2 of each. However you like your meat seasoned. It's one of those things where I just never have measured and probably never will. use your hands to mix everything together. if the mix seems to moist add some more breadcrumbs or parm. Too dry add a little water. Use a cookie sheet and spray with Pam. Form the meat into balls. I can usually get 2 dozen meatballs out of this mix which is the perfect amount to fit on my pan. Put them in the oven for about 20-25 minutes or so.
Meanwhile, put some water on to boil for the spaghetti and get your sauce heated up. You want to put the jar of spaghetti sauce into a pot and then add the diced tomatoes (don't drain). Add some extra seasonings, chop your onion/pepper and add those in. I have also been known to add zucchini, yellow squash, or mushrooms to my sauce. Also if you have other veggies you need to get rid of like carrots and celery, you can chop or shred them so they are too small to notice and add them to the sauce. Sometimes you have to sneak extra veggies in where you can!! When the meatballs are done take them out of the oven and add to the sauce. I usually have it timed so that when the meatballs come out I can throw my garlic bread in and everything will be ready at the same time.
When your pasta is done boiling, drain it but don't add it to the sauce right away. Toss the pasta with some shredded parmesan cheese-this helps the sauce stick to the noodles, a trick I learned from Giada on food network-then add to the sauce, toss till coated, and serve. My garlic bread is always a cheat, I get a loaf of it from the bakery at walmart and freeze it. Then whenever we want garlic bread I take out however many slices and bake them. One loaf lasts us about 3 meals which is way better than the garlic bread that is in the frozen section.
Monday, May 16, 2011
New Recipe 7/52: Creamy Mushroom Soup
So this was pretty random, I wanted to see if I could make my own mushroom soup so I looked at a few different recipes and then winged it. Amazingly, it turned out pretty good! I didn't take any pictures again, but ya know, once you have seen one creamy mushroom soup you have kinda seen them all. I'm just sayin'...Anyways I will try and get back into the picture thing next week. it's not that my food doesn't look delicious I just have been forgetting to bust out the camera.
So here was the soup. ingredients: 16 oz whole mushrooms. Half of them sliced and half of them rough chopped. 1 onion, diced tiny. 6 carrots, diced finely (They were pretty small carrots. bigger carrots I would gone with 3 or 4). 3 celery stalks, diced. Chicken broth (the big box kind-i think that's like 32 oz?). Red cooking wine-maybe 1/4-1/2 cup or so. 8oz cream cheese and about a pint of heavy cream. about a cup of mozzerella cheese.
Get out a large pot and put a little water in it to boil. Not much, maybe 3-4 cups. Chop your celery, carrots, and onion and add it to the hot water. Add the cooking wine and the chicken broth. Next do your mushrooms. Now depending how you feel about them you could dice or slice all of them, I did half diced and half sliced cause I like having bigger pieces of shroom in my soup. I used the white cap mushrooms that you get at the store, nothing too fancy but if you happen to be a mushroom hunter and have a bunch of wild ones I bet this would be a pretty tasty way to use them up. Anyway get your mushrooms into the pot and then just let the soup simmer till it boils down a bit. I left it on for about 45 minutes or so, stirring it occasionally.
Next add the cream cheese (Softened to room temp) and the cream. Keep the heat on it to help it all melt/blend together. This is also when you want to add the cheese in. Once everything is blended together remove from heat and serve. I tossed some of those mini saltines into mine and they went pretty well with the soup. Some crusty bread would have also done well. Hubby and I both thought this was pretty good soup. You may notice I did not add any seasonings, not even salt. The mushrooms and the veggies and the broth gave the soup enough flavor that I didn't feel like I needed to add anything else to it. If you want to feel free to give it a shot.
This made a pretty good quantity of soup so we do have some leftovers. I am going to make some plain noodles to toss with the leftovers and that will probably use them all up. If I was any good at making rice (for some reason I always kill it) it would probably go good with rice as well.
Tuesday, May 10, 2011
Classic Recipe 6/52: Basic Chili Recipe
So it must be no picture week because I didn't take a pic when I made chili the other night. Whoopsy!! But seriously, if you don't know what chili looks like you must be living under a rock or something.
So what I am going to give you is my basic recipe for chili. I don't always put everything in here that's on the ingredients list. The awesome thing about chili is you can mix and match what's going in and make it different every time.
Must Have ingredients: 3 cans beans-can be kidney or black beans or a combo, 1 can diced tomatoes, 1 can tomato sauce, 1 packet chili seasoning, 1 can beef broth, 1 onion, chopped, one pepper, chopped, at least one pound meat (ground beef, stew beef chunks, pork sausage-sometimes I use a combo, depends what I have lurking that needs to be finished up).
Optional Ingredients: 1 can corn, 1-2 lbs potatoes cut into bite-size chunks, 1 jalapeno, chopped fine, 1 clove garlic, chopped, a little chili powder, cumin, cayenne pepper, black pepper, crushed red pepper, about 1/4 cup brown sugar (adds a sweetness that takes the bite away from the spicy).
Throw everything in a crock pot and cook on high for 4-6 hours or low for 8+ hours. Beyond the prep of opening cans and chopping a few veggies, this is basically a cheat meal. This week I threw it on after I took the kids to school and before I went to bed (I work 3rd shift). Hubby gave it a few stirs throughout the day and it I could smell it the second I woke up. Yum yum!!! The potatoes I was kind of unsure of till I tried it, but they are chunky and make a good filler and add a different texture to everything. The corn adds a bit of sweetness even if you don't do the brown sugar. If you choose to add jalapeno don't worry one little pepper does not make it too spicy, especially if you take the ribs and the seeds out of the pepper. another thing you can add if you have it around is some fresh tomatoes, chopped up into chunks. you can do that instead of or in addition to the can of chopped tomatoes, depending on how much you like them in your chili. I never have added them but you could also chop some carrots and/or celery and add it in. You could also add some bacon. mmmm, I think I am adding that next time. :)
I make this at least once a month, even in the summer, just cause it's so easy and then we will usually have leftovers for a few days. Of course you gotta have saltines to crumble in there (they make mini ones now that are soooooooo cute!!) and I usually add some cheese and sour cream and crunchy onions on top too.
Monday, May 9, 2011
New Recipe 6/52: Bison Meatloaf
So I actually tried this one a while back. I made the recipe up myself. We recently found a local store that sells bison meat in one-pound chunks so we will pick some up now and then. I think bison is super tasty, and it's less fatty than beef. it's pretty pricy though; where we buy it it is around $9/lb so we don't cook with it more than once every few months or so.
About the only thing I did different than what is here is the gravy and veggies could not really be separated too well so I just added gravy till the loaf felt right. You could very easily sub beef for the bison if you don't want to kill your budget, and if you slice the mushrooms instead of chopping them it might make them easier to take out ofthe gravy if you wants. I am on a mushroom kick lately so I have been trying to find new things to try with them. :)
And I also want to apologize for not including a pic. I can't remember for sure if I took one when I made this, if I did it is not saved on the computer I am using right now. If I come across it on the other 'puter I will add it but otherwise you will have to make it yourself to see what it looks like. Hint: it looks like a meatloaf.
Ingredients: 2 lbs ground bison, I lb ground pork, 1 onion chopped, 1 red bell pepper chopped, 8oz fresh mushrooms, chopped, bread crumbs, 2 garlic cloves, chopped, 2 eggs, red cooking wine, beef stock,
thyme, bay leaves, tomato paste , grill seasoning, black pepper
thyme, bay leaves, tomato paste , grill seasoning, black pepper
Chop pepper, mushroom, onion and sauté in a little olive oil till they are soft. Add garlic and sauté a few more minutes. Add a few tbsp. tomato paste and cook till brown. Add 1 cup red cooking wine, 1 bay leaf, a little thyme, simmer till reduced by about half. Cover veggies with beef stock and simmer till sauce is thickened. Add a little flour to thicken if needed. Scoop out veggies, remove bay leaf and reserve sauce. Mix veggies with meat, eggs, about ½ cup bread crumbs, some grill seasoning, some black pepper. Form into a loaf, if too dry add some of the gravy. Pour remaining gravy over the top of the loaf and bake at 350 for about an hour and a half, till cooked through.
About the only thing I did different than what is here is the gravy and veggies could not really be separated too well so I just added gravy till the loaf felt right. You could very easily sub beef for the bison if you don't want to kill your budget, and if you slice the mushrooms instead of chopping them it might make them easier to take out ofthe gravy if you wants. I am on a mushroom kick lately so I have been trying to find new things to try with them. :)
And I also want to apologize for not including a pic. I can't remember for sure if I took one when I made this, if I did it is not saved on the computer I am using right now. If I come across it on the other 'puter I will add it but otherwise you will have to make it yourself to see what it looks like. Hint: it looks like a meatloaf.
Tuesday, May 3, 2011
New Recipe 5/52: Bacon Cheeseburger Meatloaf
So I saw Paula Deen making this and knew I had to try it. Here is a link to the recipe: http://www.foodnetwork.com/recipes/paula-deen/bacon-cheeseburger-meatloaf-recipe/index.html
I followed the recipe pretty exactly, and when I watched the episode of the show where she makes this I learned a new trick: when you build you meatloaf on a pan or in a dish, put a layer of white bread slices under it, and the bread will sop up the grease from the meatloaf. worked out really well!! The meatloaf itself really tasted like a bacon cheeseburger and even my kids tried some (shocking!!) the loaf itself was kinda small for me but it actually worked out so that there was hardly any leftovers.

I followed the recipe pretty exactly, and when I watched the episode of the show where she makes this I learned a new trick: when you build you meatloaf on a pan or in a dish, put a layer of white bread slices under it, and the bread will sop up the grease from the meatloaf. worked out really well!! The meatloaf itself really tasted like a bacon cheeseburger and even my kids tried some (shocking!!) the loaf itself was kinda small for me but it actually worked out so that there was hardly any leftovers.

Monday, May 2, 2011
Classic Recipe 5/52: Meatball Sub Casserole
I have been making this one for about the past year or so, I found the recipe in a cookbook and in a magazine I love meatballs so this is a fun new way to make them. I always check the discount bakery racks at walmart when i am there and pick up a loaf of the french bread and toss it in the freezer till i am ready to make this. I make my own meatballs but you could just as easily get the frozen kind.
Ingredients
8oz cream cheese, softened, 1/2 cup mayo, tsp or so italian seasoning, 1 loaf french bread, 1 jar spaghetti sauce, shredded mozzerella, parmesan cheese. For the meatballs: 1 lb ground beef, 1 lb ground pork sausage, 1 egg, bread crumbs (about 1/2 cup or so) salt n pepper, 1/2 onion chopped fine, garlic powder, oregano.
Preheat oven to 350. Mix all the meatball ingredients together and shape into balls. I usually get 18-24 meatballs. Place them on a baking sheet and bake about 15-20 minutes. Meanwhile, cut the bread into bite size pieces and lay them in a single layer at the bottom of a 9x13 baking dish. You may have extra bread pieces. Mix the mayo, cream cheese, and italian seasoning together and spread over the bread slices. sprinkle with a little of the shredded mozzerella. when the meatballs are done layer them on top of the bread, then pour the spaghetti sauce over that. Top with the parmesan and the mozzerella, bake for about 20-25 minutes.

Wednesday, April 27, 2011
Kitchen Chat: All dish soaps and sponges are NOT created equal!!!
So normally I use good old classic Dawn dish soap. We don't have a dishwasher so everything is done by hand (bummer for me). Sponges I use Ocello (I think?) they are blue and kinda curvy. Anywho recently I decided to try the dawn soap that has the oil of olay right in it. Bought a whole huge bottle of it thinking it would help my hands not be so dried out. Ha. Didn't really make a difference at all, just a reason for them to charge you more! I also tried the Gain dish soap when it first came out, mostly cause I had a coupon and figured I would give it a shot. While the smell was different from Dawn (in a good way) and it was cheaper (even without a coupon) it seemed more watery. I had to use way more of the soap to get the same amount of dishes clean compared to with the dawn. As for sponges there has been times when for whatever reason I had to get the super-cheap ones and there is most definitely a difference!!! They don't scrub as well and they don't last as long. As it is with the amount of dishes we do we go through a sponge maybe every week or so, which seems like a lot to me. We also have a scrub brush on a stick, mostly for those damn sippy cups I can't seem to throw away (not that my kids can't drink out of a regular cup but they have a tendency to spill a lot and sippies save me a lot of cleanup).
Tuesday, April 26, 2011
Classic Recipe 4/52: Homemade Stuffed Crust Pizza
Heck yes! Who doesn't love pizza? Better yet, who doesn't like pizza that you made yourself with a stuffed crust just like certain pizza chains? I can't remember the last time we had hot pizza delivered to us. I want to say it's been over 2 years. Seriously. I think I have gotten papa murphy's take n bake pizza maybe once in that same time period. When we want pizza, we do a frozen pizza, or I make it homemade. And depending on what toppings are going on there, it doesn't usually take any longer than if you order delivery or throw in a frozen 'za. It will not, however, go on the pizzazz. In case you were wondering. :)
Ingredients: 8 pieces string cheese, 1 jar pizza sauce, 2 boxes jiffy pizza crust mix, shredded cheese, any other toppings you desire. I usually go with pepperoni and black olives, sometimes sausage n mushroom, it depends what I have lurking around that needs eaten.
 Mix the pizza crush mix according to the box directions. it's a good idea to have a rolling pin and some flour for dusting ready. The dough will have to rise for about 5 minutes, when it's done roll it out onto your pizza pan. Get it as far to the edge as possible and even a little over the edge if you can. Now you need your pieces of string cheese. Roll the edge of the crust around the string cheese. 8 always fits perfect on my pizza an and when you take it out of the oven it makes an easy guideline for slicing the pizza.
Once you have the string cheese rolled into the crust pre-bake it for a few minutes-temp will be on the box I think it's 425. Take it back out and add your toppings. I never use the whole jar of sauce it makes it too saucy for my taste, so I put the rest in the fridge and use it later in spaghetti sauce or make mini pizzas on garlic bread.. Anyhoo Add all your toppings except the cheese, put it back in the oven and leave it in about 15-27 minutes. take it out one more time and add the shredded cheese. Back in the oven for a few more minutes till the cheese is nice and melty and delicious. Then back out a final time for slicing and eating.
 Not a terribly expensive meal, we always have string cheese on hand, we get a bulk package of it every few weeks at sam's club, but you can get it in a package of 8 if you don't eat a lot of string cheese normally. Crust mix and sauce are pretty cheap as well and if you aren't going super fancy with the other toppings you can keep it cheap. Reheated this pizza is pretty good too, we normally have 3 or 4 slices leftover. The crust is pretty thick and one slice is usually enough to fill a person up.
Ingredients: 8 pieces string cheese, 1 jar pizza sauce, 2 boxes jiffy pizza crust mix, shredded cheese, any other toppings you desire. I usually go with pepperoni and black olives, sometimes sausage n mushroom, it depends what I have lurking around that needs eaten.
 Mix the pizza crush mix according to the box directions. it's a good idea to have a rolling pin and some flour for dusting ready. The dough will have to rise for about 5 minutes, when it's done roll it out onto your pizza pan. Get it as far to the edge as possible and even a little over the edge if you can. Now you need your pieces of string cheese. Roll the edge of the crust around the string cheese. 8 always fits perfect on my pizza an and when you take it out of the oven it makes an easy guideline for slicing the pizza.
 Once you have the string cheese rolled into the crust pre-bake it for a few minutes-temp will be on the box I think it's 425. Take it back out and add your toppings. I never use the whole jar of sauce it makes it too saucy for my taste, so I put the rest in the fridge and use it later in spaghetti sauce or make mini pizzas on garlic bread.. Anyhoo Add all your toppings except the cheese, put it back in the oven and leave it in about 15-27 minutes. take it out one more time and add the shredded cheese. Back in the oven for a few more minutes till the cheese is nice and melty and delicious. Then back out a final time for slicing and eating.
 Not a terribly expensive meal, we always have string cheese on hand, we get a bulk package of it every few weeks at sam's club, but you can get it in a package of 8 if you don't eat a lot of string cheese normally. Crust mix and sauce are pretty cheap as well and if you aren't going super fancy with the other toppings you can keep it cheap. Reheated this pizza is pretty good too, we normally have 3 or 4 slices leftover. The crust is pretty thick and one slice is usually enough to fill a person up.
Monday, April 25, 2011
New Recipe 4/52: Pan-fried Pepper Ring Meatloaf
So I saw Sunny Anderson (my fave food network chick, by the way) make this recently and it immediately went on my list of things to try. I'll write out the recipe as I made it but I first want to include a link to the original in case you want to do it that way. I skipped the fresh/fried sage and my peppers were a little small so I did not get as many rings as she did. But other than that I stuck to the recipe.
http://www.foodnetwork.com/recipes/pan-fried-meatloaf-in-tricolor-peppers-recipe/index.html
Ingredients: 3 bell peppers, preferably in 3 colors to make it prettier. 1/2 lb ground beef, 1/2 lb ground turkey, 2 slices white bread, cubed, 28 oz can crushed tomato with basil (I just added some basil to a regular can), 2 minced garlic cloves, 1 egg, 1 small onion, chopped fine, 1 tsp or so worcestershire sauce (something I am incapable of spelling or pronouncing correctly), salt n pepper.
 Preheat oven to 400 degrees. Remove the core/seeds from the peppers, slice into rings about 1 inch high. Mix together everything elseexcept the crushed tomato, only mix in about 1/2 cup of the tomatoes. Press the meat mixture into the pepper rings. Get a little oil hot in a skillet-make sure it's one that can also go in the oven-cook the rings w/meat in them about 5 minutes each side. Add the rest of the tomatoes to the pan and bake in the oven for about 20-25 minutes.

I thought this came out pretty good. I like the idea of a stuffed pepper meatloaf, although this particular meatloaf blend was not to my normal taste, it was a little moist for what I normally like. Next time I will probably use bread crumbs rather than fresh bread, to try and dry it out a little. But overall it was a pretty good dish and I was even able to get my kids to take a few bites without too much fuss. I took leftovers to work the next night and it was still good reheated, the peppers kept a good amount of crunch to them. I will definitely be trying this one again. My husband and I both like meatloaf and I like to try different variations on them so we don't get sick of the same kind all the time. So be ready for a lot more meatloaf recipes over the next year!!!

http://www.foodnetwork.com/recipes/pan-fried-meatloaf-in-tricolor-peppers-recipe/index.html
Ingredients: 3 bell peppers, preferably in 3 colors to make it prettier. 1/2 lb ground beef, 1/2 lb ground turkey, 2 slices white bread, cubed, 28 oz can crushed tomato with basil (I just added some basil to a regular can), 2 minced garlic cloves, 1 egg, 1 small onion, chopped fine, 1 tsp or so worcestershire sauce (something I am incapable of spelling or pronouncing correctly), salt n pepper.
 Preheat oven to 400 degrees. Remove the core/seeds from the peppers, slice into rings about 1 inch high. Mix together everything elseexcept the crushed tomato, only mix in about 1/2 cup of the tomatoes. Press the meat mixture into the pepper rings. Get a little oil hot in a skillet-make sure it's one that can also go in the oven-cook the rings w/meat in them about 5 minutes each side. Add the rest of the tomatoes to the pan and bake in the oven for about 20-25 minutes.
I thought this came out pretty good. I like the idea of a stuffed pepper meatloaf, although this particular meatloaf blend was not to my normal taste, it was a little moist for what I normally like. Next time I will probably use bread crumbs rather than fresh bread, to try and dry it out a little. But overall it was a pretty good dish and I was even able to get my kids to take a few bites without too much fuss. I took leftovers to work the next night and it was still good reheated, the peppers kept a good amount of crunch to them. I will definitely be trying this one again. My husband and I both like meatloaf and I like to try different variations on them so we don't get sick of the same kind all the time. So be ready for a lot more meatloaf recipes over the next year!!!

Wednesday, April 20, 2011
Kitchen Chat: Cheat Dinners
So I want to talk about some of the cheat dinners that I make. Stuff that I don't really cook it's more like I throw it in a pan or in the oven. We are not big fans of the dinner in a bag that you throw in a pan. We have tried a lot of them but they all kinda taste the same. One thing we do like is a frozen stir fry. The ones that Wan Chai Ferry make are pretty decent, and for now since the kids don't eat a whole lot it stretches for all 5 of us, if we make some eggrolls to go with it. They have some other ones withe the frozen veggies at walmart and then you get the sauce separate in the asian food aisle.
Another dinner that's easy to make on the fly is burgers n fries, I cheat and get the pre-made patties. I know, I know, I could make them and freeze them myself but I don't. it doesn't take much to throw them in the pan and throw some fries in the oven.
When i am feeling really lazy I will throw in a frozen pizza, or we will have what was formerly known as the "pizzaz special"-a bunch of frozen stuff heated up like chicken nuggets, pizza rolls, mozzerella sticks, etc. Not that we have that stuff all the time for dinner, but once in a while it's nice to take a break. Once in a while we will let the kids pick what's for dinner and 9 times out of 10 they choose mac and cheese and hot dogs. Which is also a pretty quick and easy meal to make. The other thing they pick a lot is pancakes, whcih isn't even much of a cheat, if you think about it. Who doesn't love breakfast for dinner? but the cheat there is that I use a pre-made mix. Once in a while I will try pancakes from scratch but they are never as good as the mixes.
I try to only do a cheat meal once or twice a week. Of course those are the meals my kids love the most, the stuff that is not as good for them and I barely think about to make. it's the stuff that I work really hard at that they never wanna try. *sigh*
Tuesday, April 19, 2011
Classic Recipe 3/52: Loaded Baked Potato Soup
Just like it sounds, it's a loaded baked potato in soup form. It's a twist on another recipe I had tried for potato soup, and it has quickly become a family favorite. Be warned: this is a soup to make on a weekend when you have plenty of time, and it is NOT figure friendly. Very rich and creamy.
Ingredients: 1 lb bacon, 2-3 lbs potatoes, 2-3 carrots, 2-3 stalks celery, 1lb or so frozen broccoli, 1 onion, 8oz cream cheese, one stick butter, 8oz package velveeta shreds (find them in the shredded cheese area), 1 pint cream, 1 pkg oscar meyer bacon bits, sour cream and crunchy onions (for garnish, optional).
Get to work chopping your veggies. You want them pretty small. Don't worry about chopping the broccoli, it should be small enough in the package. Put all the veggies in the pot and cover with water. Bring it to a boil and then reduce to a simmer. let it simmer for a few hours, stirring occasionally. Add more water as needed, don't worry about too much water b/c you will be draining off any excess liquid later.
About half an hour before you are ready to eat, chop the bacon into bite size pieces and fry it up. Just before it is done, take the pot off the stove and drain off most of the excess liquid. You want it to be pretty mushy, so if there are any big chunks of potatoes or broccoli left mash them up a bit. Now you're ready to add everything else in. The cream cheese will blend better if it's at room temp. I also add the bacon grease along with the bacon chunks, it makes for a more bacon-y flavor, but that's your call. Another thing you can do to add bacon flavor is put a raw piece of bacon in the pot with the veggies at the beginning, just fish it out when you drain off the liquid. Save aside some of the bacon bits to sprinkle on top of each bowl. if it seems too thick add a little more cream (milk will do the trick if you don't have more cream). If it's too thin you can add some sour cream to thicken it up a little more.
This soup is super tasty with some crusty bread to dip it in, or if you have sourdough bread bowls (like they have at panera's) that would be awful tasty as well. I have tried the bread bowls they have at hy vee but they were not up to my standards.

mmmm bacony goodness

pre-draining the liquid. looks kinda gross

the end result. it's more delicious than it looks. trust me
Monday, April 18, 2011
New Recipe 3/52: Stuffed Mushrooms
Another recipe from allrecipes.com. It was pretty simple to make, came out pretty tasty, and it is something I will most definitely be trying again cause I loooove mushrooms!
Ingredients:
12 fresh mushrooms, 1 T olive oil, 1 clove minced garlic, 8 oz cream cheese (softened), 1/4 cup parmesan cheese, 1/4 tsp each of ground pepper, cayenne pepper, and onion powder.
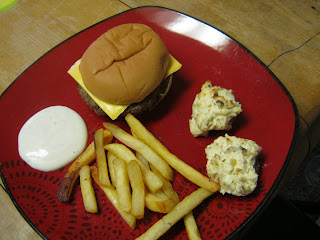 Preheat oven to 350. spray a cooking sheet with pam. Break the stems off the mushrooms and chop them up pretty fine. Put this and the garlic in a frypan and saute, then set aside. Let it cool off a bit then mix it in with the cream cheese and other ingredients. Stuff into the mushroom caps and bake for about 20 minutes. I served it with burgers and fries.
I used a pre-packaged thing of mushrooms, it was not quite 10 of them. Next time I make this I plan on using more mushrooms but the same amount of filling as they were really overstuffed. Other than that I thought it was perfect!! It was super easy to make and prep/cooking time was only about 30 minutes total. It made a nice side dish to spruce up an otherwise pretty basic meal.
Wednesday, April 13, 2011
Kitchen Chat: The pizzazz is NOT just for pizzas!!
Oh, dear pizzazz, how do I love thee? Let me count the ways.....
When we got married one of the gifts we got was a Pizzazz pizza maker. His parents got it for us, I believe. It didn't take long for us to discover how supremely awesome they are. not only do they cook a frozen pizza to near perfection, they cook ALMOST ANYTHING that you would bake on a baking sheet. Without preheating the oven (heating up your whole kitchen in the process, not to mention that dreadful waiting for the oven to preheat). Over the years since we got married we have made pizzas, pizza rolls, chicken nuggets, corn dogs, taquitos, mozzerella sticks, frozen quesadillas, I can't even tell you everything we have made on there. Garlic bread, cinnamon rolls, biscuits. The list goes on and on. I even used it to bake cheddar biscuits for thanksgiving one year cause the oven was full. It doesn't have a heat setting on it, the only options are heat on top, heat on bottom, or both. So you don't have to worry about the temp, just put your food on there and let it spin. Make sure you start the timer. I can't tell you how many times I forgot to set the timer and came back 10 minutes later to find my cold food still spinning and not cooking (it won't heat up without the timer on).
We recently laid to rest our 2nd pizzazz since we got married. The first one we thought was dead, so we went out and replaced it (it was 5 years old). Turns out we had blown the fuse for the outlet we were plugging it into. LOL. So we gave our old one to a buddy of ours and started a fresh pizzazz. We treat the tray like a cast iron skillet or a baking stone: mostly it just gets a rinse/wipedown so it has a lot of flavor built up on it.
The 2nd one lasted about a year before I killed it. I had some fries on there cooking to go with dinner and the hot dog buns I was going to use were not totally thawed from the freezer yet, so I put those on top of the fries to help them thaw and walked away. Came back a few minutes later to find the buns on fire because they had caught on the heating element. Whoopsies!! It killed something in there cause now it won't heat up. Sadness. haven't replaced that one yet so for the last few weeks I have been pizzazz-less. let me tell you it has been a rude awakening. In a home with 3 small kids we go through a lot of tater tots, fries, chicken nuggets, etc. Which means a lot of times I have had to preheat the oven, and (gasp) look at the instructions for what I am cooking to see how hot the oven should be and how long it should be in there. Not cool. Needless to say I can't wait to replace the zazz (as the kids call it) so I can get back to not using my oven.
Tuesday, April 12, 2011
Classic Recipe 2/52: Quesadillas
I used to have a quesadilla maker. I won it at a work thing. it was cool, but not very functional, in that all you could make with it was...quesadillas. Not that I don't love them, but I want my kitchen appliances to be able to do a little more for me. So I got rid of it the last time we moved. As a result I have not made quesadillas in about a year. So I decided to bust some out the other night and made them in a pan on the stove top.
Ingredients:
Flour tortillas, 1 can corn, 1 can refried beans, 1 can sliced black olives, salsa, and cheeeeeeeeeese

pretty simple to make. Spray your pan with some pam so the tortilla doesn't stick. Spread some refried beans on the bottom tortilla. Then a little shredded cheese, some corn and black olives, salsa, more cheese, refried beans opn the top tortilla, slap 'em together and throw them in the pan. 1 can of beans and corn was enough for 3 quesadillas, the kids split one and my husband and I each had one. They are pretty filling. Previously I have had onion and pepper in them but I wasn't in the mood for chopping veggies so I skipped it. It was pretty cheap to make, and in the summer you can swap a can of corn for some fresh off the cob corn (mmmmmmm my fave!!). I have also mixed up cooked chicken with a nacho type soup and cheese and made that into quesadilla filling before, that comes out more like a taco bell quesadilla.


On the down side the tortillas got a little over-browned in the pan, I think next time I will try baking them and see if that works out a little better. Always looking for ways to improve!
Monday, April 11, 2011
New Recipe 2/52: Baked Spaghetti
This is another recipe I got from the allrecipes website. I have also seen Paula Deen make a version of it.
Ingredients:
1 lb spaghetti, 1 jar spaghetti sauce plus one can tomato sauce, shredded italian blend cheese, 1 lb pork sausage, 1 clove garlic, parmesan cheese, italian seasoning, salt n pepper, 16 oz cottage cheese, 1 zucchini, 1 small onion, 1 can mushrooms, 2 eggs, 5 tbsp melted butter.

Slice the zucchini, chop onion as fine as you like, chop th garlic fine. Toss them all in a pan with a little olive oil. Add the meat, let it get brown. Drain fat/grease. At the same time, get water bioling for your pasta. When your meat is cooked and drained, add the mushrooms, tomato sauce/spaghetti sauce, season with some salt/pepper, italian seasoning, etc, and heat up. In a small bowl, mix the melted butter with (beaten) eggs and about 1/3 cup parmesan cheese. Drain your pasta and toss with the egg mixture. In a 9x13 pan, layer as follows: a little bit of sauce, half of spaghetti noodles, half of cottage cheese, half of sauce, shredded cheese. Repeat layers.

Cover with tinfoil, bake at 350 for about 40 minutes. Remove tinfoil, bake for an additional 20 minutes till cheese is nice and melty.

I served this with garlic bread. The taste was great. I love italian food. However this was not terribly different than your regular spaghetti with meat sauce. The baking process made the pasta and sauce bind together more than it normally would, but when we reheated leftovers it pretty much fell apart. not that it didn't still taste good, it just was a lot of extra work to end up with spaghetti with meat sauce. Also, this made A LOT of food. The casserole dish was HEAVY. I mean, you add it all up and we are looking at about 5 lbs of food. When my kids are older and are eating me out of house and home that will be one thing, but right now they don't eat that much. I gave a big dish of leftovers to my brother and we were still eating it for 2 more days! this would be a really good dish to make if you were going to a potluck of some sort, or if you are having a bunch of people over for dinner. Then it's like portable spaghetti!!
The cool thing about this dish though is just like spaghetti sauce you can make it your own. Do peppers instead of zucchini, skip the onion, add more garlic, whatever you like. Normally when I do spaghetti I doa jar of ready-made sauce and then add some plain tomato sauce and season it up with extra spices/seasonings.
Wednesday, April 6, 2011
Kitchen Chat: My Staples
Everyone has some go-to items that they always have on hand. Stuff that they know they can always use to throw SOMETHING together in a pinch. So I want to talk a little about what I keep on hand. I would love to hear back from other people about what they keep in their own pantries, it would maybe give me some new ideas!!
Jiffy Pizza Crust Mix. This stuff is cheap, doesn't take up a ton of cupboard space, and the crust it makes is decent. I have tried the pizza crust that is already made, and it tastes decent, but takes up more space. And you can't make it into a stuffed crust (I will devote a later blog to how to make a homemade stuffed crust). and The pizza crust mix makes good dough for the braid. I suppose I could probably figure out a way to make breadsticks with it too. Hmmmm now there's an idea to toss around....
Cheese. Shredded, different varieties. I ALWAYS have cheese on hand. I may eventually start buying blocks and shredding my own, but for now I just get the already shredded stuff. I usually have an italian blend, a taco blend, and a monterrey/cheddar blend. Plus parmesan, usually a few different kinds.
The Canned. Kidney beans, black beans, refried beans, green beans. Peas, corn, carrots. It's just good to have a few of those on hand most of the time. And then there's the tomato products. Diced tomato, crushed tomato, tomato sauce. I always have a few jars of spaghetti sauce on hand. I don't keep tomato paste around though. not sure why. And Sloppy Joe sauce. Gotta have some of that around. :)
Onions and Peppers. They go in everything. In the summer I go to the farmers market and get tons and tons of fresh stuff, then I have a day or 2 where I chop it all and bag it in 1/2 cup baggies and freeze it. This year it ran out quick due to a certain cat unplugging my freezer, but last year I didn't have to buy onion or pepper all winter long.
I know there is other stuff I am forgetting that I would die without, so I will probably add to this later. But using just what I have listed above plus some ground beef (that's another one I always have in my freezer!! I feel like I am out of food without my ground beef) I can think of half a dozen meals I could make. :) I am interested to hear what other people cannot live without in their pantry.
Tuesday, April 5, 2011
Classic Recipe 1/52: Taco Braid
So this dish has evolved quite a bit over the years. Look for an upcoming post of the original recipe that inspired this, I will be sure and make it soon so I can post pics. To give you an idea of what this dish is, think giant hot pocket filled with taco deliciousness.
Ingredients:
2 boxes jiffy pizza crust mix, 1 can refried beans, 1 lb taco meat, salsa, cheese, onion, pepper, black olives. Sour cream for topping.
 Feel free to change up the ingredients. maybe you hate black olives, so skip them. Maybe you like it kinda spicy, add some jalapeno. Totally your call.
So you want to get your taco meat cooked up. While that is going, get your pizza crust mix ready (follow the directions on the box-you add some water, cover in a bowl and let it rise). After it rises and you knead it you want it spread flat on a rectangle baking sheet. Use flour on your hands, board, and the dough when kneading and spreading to help keep it from sticking.

Okay, now it's time for some layers. Start with your refried beans. Spread them down the middle of the dough, leaving maybe an inch or two on each side bare. Next your taco meat, onion, pepper, salsa, cheese on top. Did I mention you want the cheese to be shredded? Did you also notice I didn't specify what kind of cheese? I normally will not. So use whatever you want. I keep a few different kinds of cheese on hand most of the time. Anywho, at this point your braid should look something like this:
 Next you need to fold up the sides. For some reason I always end up with extra dough towards the ends so I will tear that off and use it to patch holes that inevitably show up towards the middle. Sprinkle a little cheese over the top and throw it in the oven at 425 for about 20-25 minutes. It should come out golden brown on top, like so:
 The inner deliciousness will look like this:

So now the review part. Obviously I find this to be delicious or I would not make it every few weeks or so. :) It's pretty easy to make and not terribly expensive. The jiffy pizza crust mix is maybe 50 cents a box. It's something I keep on hand ALL THE TIME (next blog this week will be about my pantry staples, btw). Good for homemade pizzas and braids. If you want a thinner, lighter crust, you can use 2 cans of crescent rolls, rolled out and pinch the edges together. if you want to go really fancy, you can cup the edges into strips and twist them over the top, making it look like it is braided (this is where the name came from). Leftover factor on this is not the greatest. the pizza dough takes on a different texture after it's been reheated. Not terrible but not as good as the first time around, IMO.
Ingredients:
2 boxes jiffy pizza crust mix, 1 can refried beans, 1 lb taco meat, salsa, cheese, onion, pepper, black olives. Sour cream for topping.

So you want to get your taco meat cooked up. While that is going, get your pizza crust mix ready (follow the directions on the box-you add some water, cover in a bowl and let it rise). After it rises and you knead it you want it spread flat on a rectangle baking sheet. Use flour on your hands, board, and the dough when kneading and spreading to help keep it from sticking.

Okay, now it's time for some layers. Start with your refried beans. Spread them down the middle of the dough, leaving maybe an inch or two on each side bare. Next your taco meat, onion, pepper, salsa, cheese on top. Did I mention you want the cheese to be shredded? Did you also notice I didn't specify what kind of cheese? I normally will not. So use whatever you want. I keep a few different kinds of cheese on hand most of the time. Anywho, at this point your braid should look something like this:


So now the review part. Obviously I find this to be delicious or I would not make it every few weeks or so. :) It's pretty easy to make and not terribly expensive. The jiffy pizza crust mix is maybe 50 cents a box. It's something I keep on hand ALL THE TIME (next blog this week will be about my pantry staples, btw). Good for homemade pizzas and braids. If you want a thinner, lighter crust, you can use 2 cans of crescent rolls, rolled out and pinch the edges together. if you want to go really fancy, you can cup the edges into strips and twist them over the top, making it look like it is braided (this is where the name came from). Leftover factor on this is not the greatest. the pizza dough takes on a different texture after it's been reheated. Not terrible but not as good as the first time around, IMO.
Monday, April 4, 2011
What is wrong with my kids?
I cook them this awesome food. Good stuff, all the time. They should be knocking each other over trying to get to it. And THEY WON'T EAT IT!! I'm not talking super fancy stuff, either. I am talking kid-friendly food like spaghetti, chili, meatloaf, sloppy joes, cheeseburgers. I have to practically beg my kids to eat their dinner. Drives me freaking crazy.
I do want to point out, however, that I do not do the short order cook thing. I cook one meal for dinner. They don't want to eat it, they don't eat. We don't always have a dessert option, but if there is one that night, they don't get dessert unless they try a few bites of everything. And if they decide later they are hungry they only get offered the same thing we had earlier. I just hope that it's a really really long phase and that one night at dinner they will look at me and be like, "Hey, mom, you are an awesome cook! This is delicious!! Thanks for forcing it on us for the last 10 years!!" is that so much to ask?
anyway I am pretty sure that even though my kids hate the food I cook for them, I am still a decent cook. Adults usually like what I fix. And other people's kids too. I think mine are just special. :)
New recipe 1/52: Chili Dog Casserole
Okay so here goes my first recipe blog. :) I had some leftover chili to get rid of and lo and behold I came across this recipe at allrecipes.com (I get a daily email from them with recipes so I am on there a lot!!)
So here was the ingredients: 1 package hot dogs (I think I used 7 or 8 out of 10), some leftover chili (about 3-4 cups), tortillas, and cheese. It was pretty simple, you layer the chili in the bottom of a casserole dish, wrap the hot dogs in the tortillas, and top with the rest of the chili, then cheese, then bake at 425 for 30 minutes (covered).


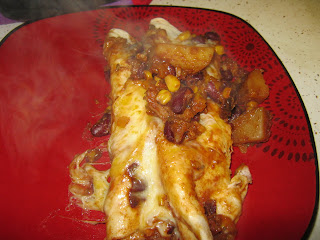
First of all, yes my chili has corn in it. I will discuss chili in a later blog post. :) Second of all, the original recipe called for 2 cans of chili, I used leftover instead. It's pretty rare that we eat chili out of a can at my house.
So this was a pretty easy recipe to make. it got some leftovers out of the fridge and the rest of the ingredients are things i have on hand most of the time anyway. It didn't take a lot of time to prep and I like having something I can throw in the oven that cooks itself. However it did seem a little lacking. Next time I make this I am going to try putting something in the tortilla with the hot dog. I'm thinking maybe some cream cheese, maybe a flavored cheese spread. Other than that it was pretty great!! We didn't finish it all the first night, so there was leftovers of my leftovers. Which were also pretty tasty. Some stuff does not do well the next day but this was not one of those dishes.
So here was the ingredients: 1 package hot dogs (I think I used 7 or 8 out of 10), some leftover chili (about 3-4 cups), tortillas, and cheese. It was pretty simple, you layer the chili in the bottom of a casserole dish, wrap the hot dogs in the tortillas, and top with the rest of the chili, then cheese, then bake at 425 for 30 minutes (covered).


First of all, yes my chili has corn in it. I will discuss chili in a later blog post. :) Second of all, the original recipe called for 2 cans of chili, I used leftover instead. It's pretty rare that we eat chili out of a can at my house.
So this was a pretty easy recipe to make. it got some leftovers out of the fridge and the rest of the ingredients are things i have on hand most of the time anyway. It didn't take a lot of time to prep and I like having something I can throw in the oven that cooks itself. However it did seem a little lacking. Next time I make this I am going to try putting something in the tortilla with the hot dog. I'm thinking maybe some cream cheese, maybe a flavored cheese spread. Other than that it was pretty great!! We didn't finish it all the first night, so there was leftovers of my leftovers. Which were also pretty tasty. Some stuff does not do well the next day but this was not one of those dishes.
Wednesday, March 23, 2011
welcome!!
Welcome to my blog!!! I spend lots of time cooking and thinking up ways to try something new in the kitchen. My friends and family enjoy hearing about my experiments in the kitchen and always want to see the recipes, pictures, and all that good stuff. I love to talk about food and kitchen stuff. I figured what better way to share my love of cooking than to start a blog and then whoever wants to check it out, can! And then I don't have to try to remember who all wanted to get a copy of the recipe. If they want it, they know where to look!!
A little bit more about me: I am 27, almost 28 (! where did the time go???). I am married and my husband and I have 3 great kids. All of them are boys, twins who will be 5 this summer and a 3 year old. They keep us pretty busy. We live in rural Iowa, and we have a cat named Boo. I first got interested in cooking about 7 years ago. My husband (then boyfriend) asked if I would try making something besides hamburger helper (not that my hamburger helper wasn't delicious, but there are only so many flavors...). So I got a cookbook from a friend and tried a few recipes. And I liked it! From there it just got better. I started experimenting with different dishes, came up with a few originals and I am always tweaking recipes that I find in magazines or online to make them just a little better suited to our tastes. I am NOT a person who measures! and therefore I don't really do well when it comes to baking. It has to be too precise. Tell me I need to throw "about a handful" of this and "a pinch" of that together and I am drooling. Tell me I need to sift 3 cups flour and 2 tsp baking soda and I give you a "duuuuuuhhhhh, okay!!" kinda look and the cookies that look so good in the picture come out mushy and have this funny taste to them.... I make a lot of casseroles. Soups, chilis, one-dish meals are fun too. Since I have young kids it can be hard to make the more time consuming dishes but I do try and tackle them now and then. The desserts that I do make are usually no-bake pies involving cream cheese and whipped cream.
My goal is to write 3-4 blogs per week over the next year. Blog one: a recipe I have never tried before. I want to include a picture of how the food came out, and I will talk about how easy or hard it was to make, if I had any difficulties finding ingredients or made any substitutions, if it was a cheap meal to make or if it was on the pricier side. This will be my priority and barring some sort of catastrophe I think I can manage to make this deadline. Blog two: a recipe that is one of my tried-and-true favorites. Some of these will be original recipes of my own, a lot of them will be recipes I got from a cookbook or a magazine. If I remember where the recipe came from originally I will cite that, but for a lot of my oldies I have been making them for so long I couldn't even remember where it came from if I wanted to, and for that I am sorry. I think I have enough tried-and-true recipes to make it once a week for a year, but I might skip a week if I am busy. Blog three: I want to talk about other cooking/kitchen stuff. I can see myself writing a blog about my love for my pizzazz, how obsessed I am with coffee, what kinds of ready-to-eat meals I buy (you know, open the bag and throw it in the pan and heat it up, eat it), coupon clipping, grocery shopping/deals, that sort of thing. 52 of those topics might be a stretch so we'll see how it goes. Blog four: probably won't be with any kind of regularity but I may post from time to time about what else is going on in my life besides food. I doubt I will do that once a week but ya never know. I do like to talk about my kids so fair warning!!! you will probably hear about them if you plan on reading this over the next year!!!!
So when is this going to start? I decided kind of on a whim today that this sounded like a cool idea so I am not really prepared with any new recipes to try, let alone the ingredients!! I have cooking magazines floating all over my house so I need to get cracking and see what kind of recipe I want to try first, then get the ingredients and get cooking. March is almost over so I think I will start the first week in April with my first real blog with a recipe in it. So be sure and check back on April 4th for my first new recipe!!
Subscribe to:
Posts (Atom)